Friday, February 26, 2010

We Are Having Technical Difficulties...

Alright peoples, I have been trying all day, downloaded a bajillion different programs and I CANNOT get this gosh-darn video to work! See, I thought I'd be all smart and film it using my new FlipVideo mini-camcorder-thingy. And I was able to do it while the girls were at school and Matt was at work. But I'm running into problems with transfering the mp4 from the flipvideo to Windows Movie Maker. It just keeps turning into sound, with no video. So, if you're a Flip user or have any suggestions, they would be greatly appreciated! If I can't figure it out by tomorrow, I'll just re-shoot the video on Monday when the house is empty again with my "normal" camcorder. Sheesh.... Technology, I tell you...

Well, so as not to leave you totally hanging, I thought I'd post a photo of what I'm currently working on....


I don't generally do religious artwork or anything of that nature, but I just have had this scripture in my head for the LONGEST time. I've also been dying to do some Wendy Vecchi/Tim Holtz inspired art. I used three distress inks (mustard seed, spiced marmalade and vintage photo) for the background on this and the letters are (as if you all couldn't tell) are Tim Holtz Grungeboard shapes. I will also say, so that anyone out there might learn from my mistakes (or get a good jolly laugh out of my inexperience) but I tried using the distress inks on a flatback canvas with not-so stellar results. They didn't have the blend-a-bility I usually get when working on paper... maybe next time I should try and ghesso it. That would probably do the trick! Alright, alright.... Lesson learned.

I'm going to continue working on this project tonight and throughout the weekend; hopefully it will be finished soon, and I already have a couple of new pieces I want to start on floating around in my noggin'.

Have a great weekend!!!!

p.s. --> Can I just say, I got SCAL (sure-cuts-a-lot) for my Cricut tonight? OMG... I am so excited. I already have a Quickutz Silhouette which can basically do the same things as SCAL, but am excited I can take it all to the next level with my Expression and start cutting out all the grungepaper, grungeboard, stencils, masks, vinyl I want!!!! WooHoo!!! Can't wait to play!

Thursday, February 25, 2010

Tortilla Soup!


Ahhhh.... Whenever I came into town from college on the weekends, I always requested my mother made this recipe. Now that I'm older, this has got to be one of my favorite meals to make. It's thick and hearty and makes your home smell absolutely delicious. I will say before starting this recipe, it's very important that you have a handheld immersion blender. You could *probably* get by with a blender or food processor, but you really don't want to because you'll be messing with hot liquid.

So before we get started, let's get our ingredients together:

2 (28 ounce) cans crushed tomatoes
2 (14 ounce) cans chicken broth
14 ounces of corn tostadas
1/2 yellow onion, chopped
8 garlic cloves, minced
4 tablespoons butter
2 tablespoons light Karo syrup
2 tablespoons sugar
1 small chipotle chile in adobo

Toppings

Sour cream
Chopped green onion
Cilantro
3 chicken breasts (approx. 3 breasts, cubed, see directions)
Shredded Cheese
Crushed Tostada Shells

First things, first; I like to have a LARGE cutting board when making a meal that requires a lot of chopping. I will also say, that cutting boards are our friends. I have multiples, and I DO NOT cross-contaminate; meaning I don't put raw meats on the same board I use to cut herbs or veggies with. I also really like having a nice quality knife. This is a Santoku knife which is highly versatile in the kitchen. Absolutely love it. Also, I reccomend having an empty garbage can handy, or if you have a compost pile, have your leftover bowl handy as well.


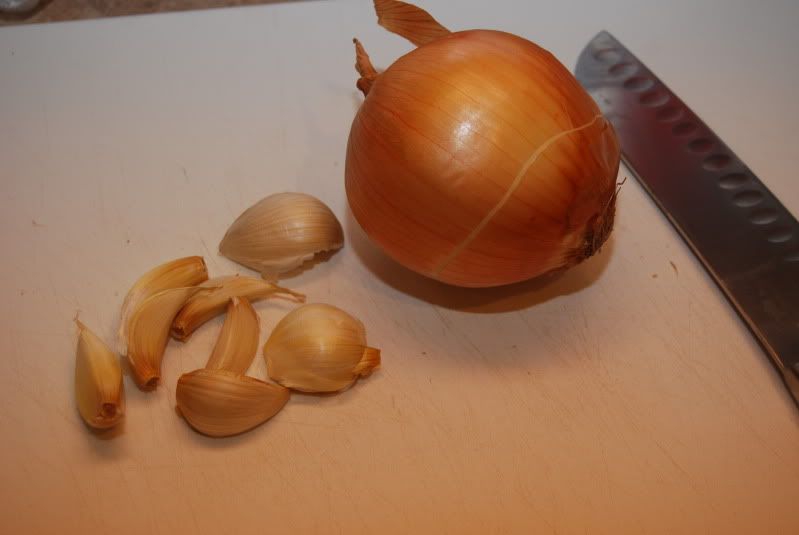
Get a large pot set on your stove and set to medium-high heat and put about 1 TB. of olive oil or other cooking oil heating. Mince your garlic (I actually use about a whole head of garlic and one full yellow onion, but I like lots of flavor) and chop your onions well. If you're struggling to get your garlic minced well, I like to sprinkle a little kosher salt (a PINCH) over the top and continue chopping... it might be in my head, but the salt seems to help break down the garlic, plus you season it at the same time. 
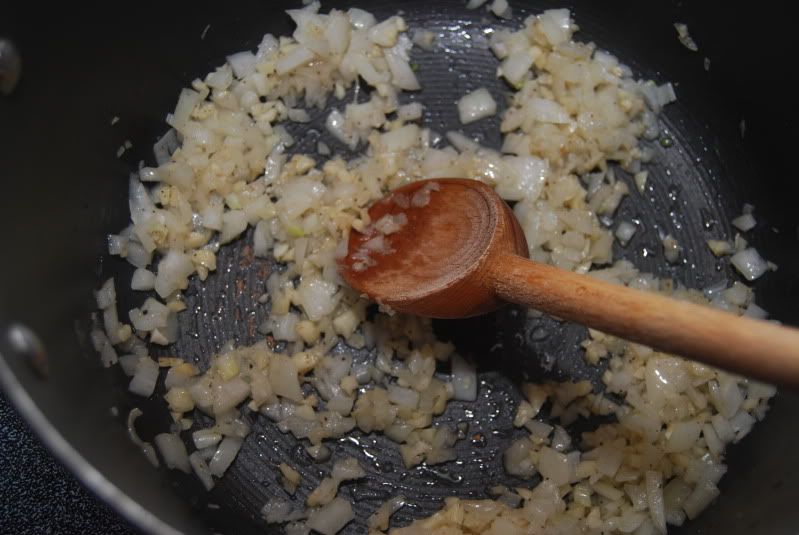
When finished, add onions and garlic to your pot and sautee until transluscent. You DO NOT want to overcook or burn your garlic as it will make your soup extremely bitter.


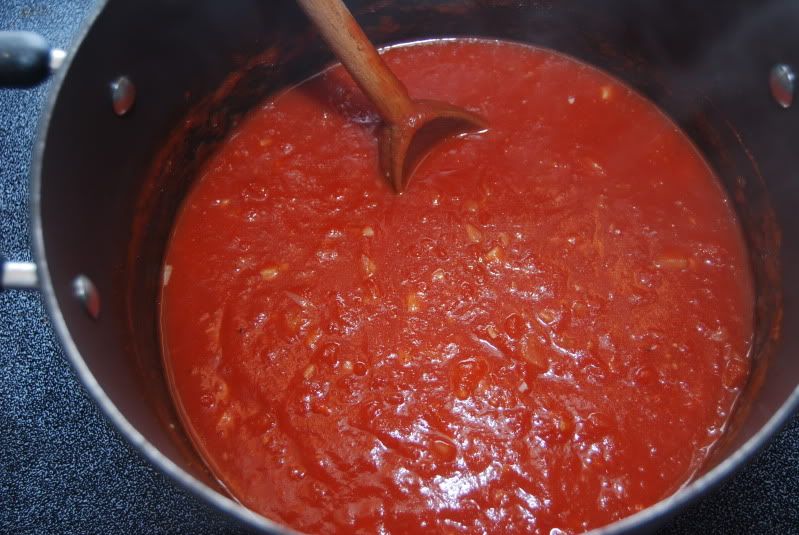
NEXT, Add your crushed tomatoes, chicken broth, caro syrup, butter, sugar and chipotle chille. I buy the Chipotle Chilli's in Adobo Sauce in the hispanic foods aisle at the grocery store. THESE ARE SPICY. Do not touch these with your fingers! The larger chilli you put in your soup, the spicier it will be! You can also add in some of the adobo sauce, but just beware of the spice. It gets more and more intense with each day it sits in your refrigerator, too w/ leftovers. Another thing to note, Chipotle chillis have an AMAZING shelf life if stored in an air tight container in your refrigerator. **For my animal-loving friends out there, you can substitute the butter with more caro syrup or even more sugar. The butter is merely there to take out some of the acidity from the tomatoes. You can of course also substitute vegetable broth for chicken.**


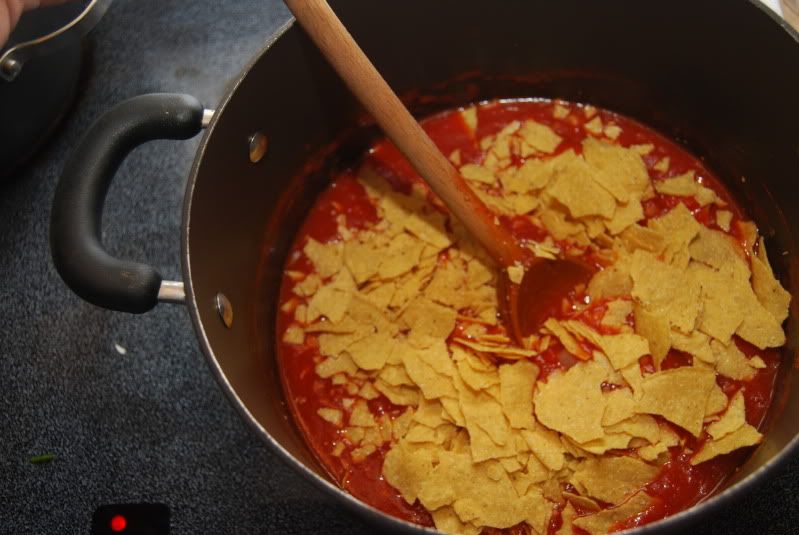
You will want to simmer this to let the flavors get acquainted with eachother for about thirty minutes. Next you will want to add about half the bag of tostada shells crushed up into the pot. Stir these in and let them get all nice and softened up by absorbing some of the soup; about 15-20 minutes.

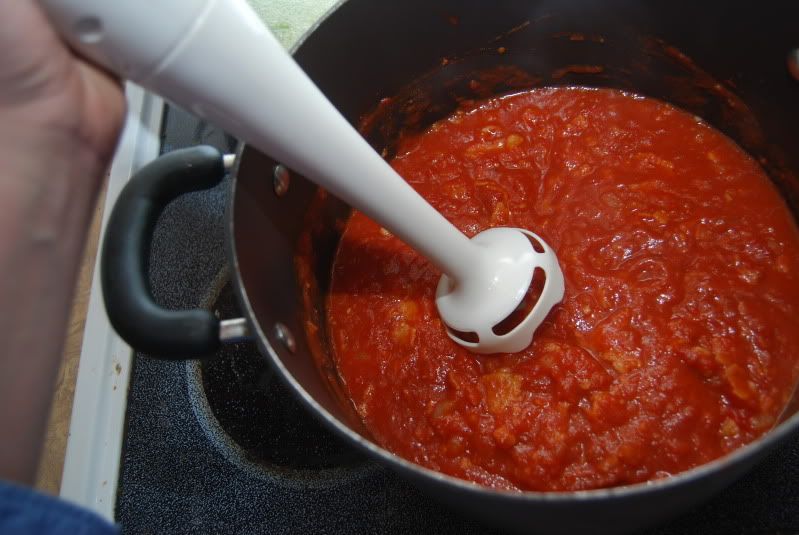
Remove your pot from heat, and use your imersion blender to break up the large soft chunks of tostada shell and mix into the soup, this will also get any larger chunks of onion or garlic you might have missed. MAKE SURE you get the Chipotle chilli with your blender, too. Blessed be the poor soul who may accidentally swallow that while eating their soup! You may want to do a couple "sessions" of blending over a twenty/thirty minute period of time. This is supposed to be a "thicker" soup, but if you want you can always add more brother at this time. Totally up to you.


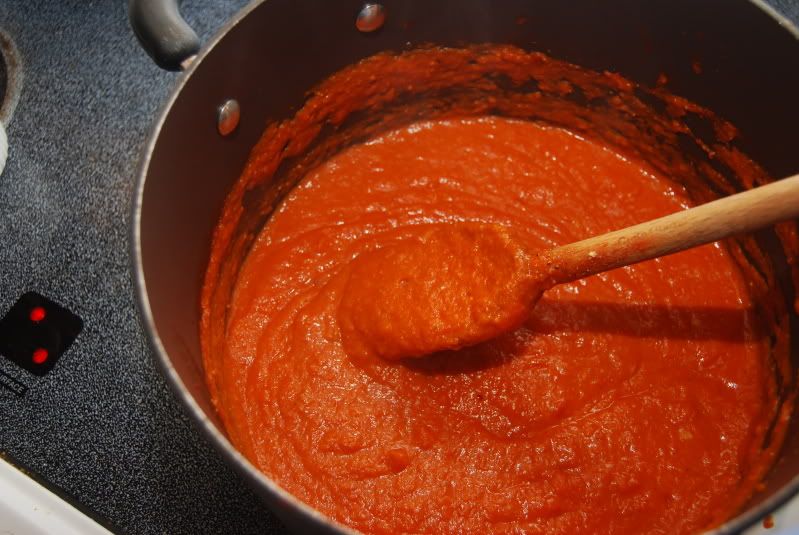
And that's it; you are done!!! You can always add more garlic or onion powder to it you'd like, I sometimes like to add paprika which gives it an even smokier, spicier flavor.


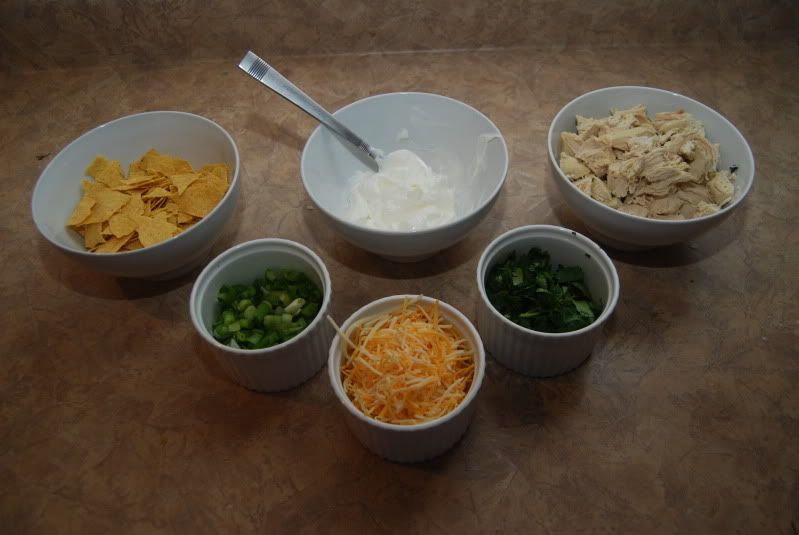
I serve my soup in a pasta bowl with crushed tostada shells, chicken, sour cream, shredded cheese, cilantro and green onions. You can use leftover chicken, but I just boil three boneless, skinless breasts in a large pot of boiling water with a large handful of cilantro, kosher salt and some olive oil for about thirty minutes. I remove them and let them cool well, then dice into cubes.


MMMMMMMMMMmmmmmmmm.....

I hope you enjoyed this little cooking tutorial! Let me know what you think! Would you like to see more recipes? Let me know if you try this one, I guarantee it is SOOO super YUMMY!!! Have a great day!

Tuesday, February 23, 2010

Do You Ever Just Get Stuck???


HELLO! Last week I had to rush to get Emma into the Kindergarten I wanted her to be in, and I had missed open enrollment for our district. SO HAPPY to say she got into the school we wanted! WooHoo! It's amazing a little over two years ago she was entered into pre-school with a "Severe Delay." Now, she's going into kindergarten and is almost at a "gifted," level with reading and math levels in the first grade level! What a journey it's been and I am SUCH a proud mother!


Now on to crafty things, do you ever just get stuck on a layout??? I was recently taking a stab at some boy-ish layouts since I don't have boys. I took this picture of, ok, it would take me half a post to figure out how this adorable little boy is semi-related to me, but just go with it... So, I took this photo around the holidays for some family. Isn't Andrew adorable? What a little heartbreaker. I knew I had to scrapbook it... I loved the coppery-reds in the background of the photo, the black and white of the dog and the blue jeans. I generally don't scrapbook right on top of patterned paper, at LEAST without mounting on cardstock with a 1/8" around the border (I'm a little crazy)... but I just LOVED this Glitz design patterned paper.
I knew I didn't want to hide it with other papers and "shtuff." I thought about doing circles... since it was kind of a "burst" pattern, it reminded me of the Sun... the sun is circle, so it makes sense, right? LOL... I whipped out some Technique Tuesday tiles that I LOVE LOVE LOVE but hate using because they're just so pretty. I also busted out three colors of glimmer mist; Midnight Blue, Coffee shop and Oriental Poppy and misted up three of the circles. I also had in my arsenal (and it's been a goal of mine to use more of my stash) some old Basic Grey Rub-Ons with a boy and a dog, a Jenni Bowlin Bingo card and some transparencies. I kind of situated it all on my scrap-island and looked at it. The photo and the circle just seemed to be floating in the middle of the page; I didn't like that. So I wanted to "ground it." I tried out two different pieces of of paper; well one was patterned paper the other was a strip of transparency. Now here's my little scrapper trick. Sometimes when I can't decide what I like best, I take a photo...


Sometimes when I take a photo and look at it, I'm able to look at my layout from a different perspective. I try and see which option makes my eyes "at ease," if you will... does anything stick out like a sore-thumb, or does the whole thing just look like a wash of the same colors? I decided I liked the green...

Next I added a couple more elements, I decided I liked some transparency flourishes I had printed out using photoshop as opposed to the little fancy pants flower. I then couldn't decide which way I liked tilting my little Bingo Card... photo time!

From here, things just flowed... I decided to change up my Bing Card for a "Lucky" one, and sanded down the numbers, applied another rub-on, because this made it stand out a little more than the last one. The title came pretty easy. Seriously, Basic Grey alpha-sheets are my scrap-crack. They can work on ANY layout. ("MY" & "Companion"). I chose the Heidi Swapp Black and White alphas for the "Constant" because it kind of went back to the "Lucky" title. I also decided to add some brads... notice I said SOME brads. It started with Five in the upper right and lower left corner. Then I though I wanted a couple more... and a couple more... soon the whole friggin' circle was surrounded. Hey, it's all good. No one uses enough brads anymore!

I hope you like the Final Layout! Here it is again!


For the rest of the week, I want to do something a little different. Tomorrow, I'm going to post one of my FAVORITE recipes, Tortilla soup, with step-by-step photos how I make it. Then Thursday or Friday, I'm going to be posting a video of my new scrapbook room... you get your own private tour... and maybe, just maybe, there will be a little giveaway involved... oh, yes... you know you're excited. If you've seen my scrapbook room, you know I have WAY too much stuff!!! Also, I had some interest in posting a tutorial on how I created my mini-grungepaper book and box that I posted last week. If anyone else is interested please let me know! The more the merrier! Have a Happy Tuesday!!!!

Tuesday, February 16, 2010

I'm Here! I'm Here!


Did you think I disappeared again? Nope! I didn't! I left up the grungy goodness up for my "All Things Tim" yahoo group to stop by and see. (Thanks ladies!) If you love Tim Holtz, you should definitely hop on over to yahoo groups and join up. So today I think I'll post our Christmas card I sent out to family and friends this year. All were handmade and the photos are actually magnetic so people can stick them on their refrigerators. (ps I don't reccomend doing this unless you don't mind paying a pretty penny on shipping... magnets=extra weight=extra money)


I also sent along a DVD I created with photos of the family throughout the year... if blogger likes me, it will post below. If you've been living under a rock for the past year, the song is Plain White T's, "1, 2, 3, 4." (Please don't sue me Plain White T's) I usually wouldn't choose something so kitschy, but I just couldn't help it. Also, if the video doesn't sync at the end with the girls' photos, I swear it does on the DVD. I painstakingly timed it for the DVD, and it wasn't easy. If you don't believe me, I have extra DVD's, I'll mail one to you just to prove it. hehehehe...


OK, and here's a non-Christmas-y thing; I made this as another possible class project. It's 3x5" canvas that are alcohol inked, as well as the clear buttons, and decorated with 1 sheet of 12x12 Websters patterned paper, wallet sized photos and MM mini-alphas (LOVE THESE!).


Tomorrow I'm hoping to post a couple Layouts I've been working on... yes, I still do layouts! I hope all is well out there in blog land. And, hey, by the way... SUPPORT YOUR LOCAL SCRAPBOOK STORES! Two of my favorites, I-Scrap AZ and Mad Scrappers, are closing this month, not to mention the one I was teaching at closed back in October. I know times are tough, and scrapbooking supplies are usually the LAST things we need right now, but please support your LSS' and think twice before running into a Hobby Lobby, Michael's, Jo-Ann's or AC Moore. THANK YOU!

Monday, February 8, 2010

Grungy Goodness -- Key to My Heart Box & Minibook

Let me start off by saying that I wasn't sure if "Grungy" was a word, and if it was how does one spell it? Grungey? Grungie as in Scrunchie? Well, you heard it here first "Grungy" is a word and that is how you spell it. (oh, and by the way, if you're still wearing scrunchies in 2010, go into your bathroom dump all of the hair-turds-that-they-are into a trashcan and light it on fire.) Now that we can move on...

As I said yesterday I had a great experience at Creative Escape this year. Tim Holtz is by far my favorite "educator" that I've had in a crafty-type class before. His classes are always laid-back, has a meaningful message, and you always make some Kick-A** art. Plus, he's just an all-around nice guy... and as I always say, "God Bless Mario, too." (Mario is Tim's right-hand-man and helps with shipping all the blog candy and putting together class kits, sample boards, etc... He claims he's not crafty, but we all know he is.) So anywho, when I got home after "class" this year, I was waiting to dive into my grungepaper and ever-growing collection of distress inks. At the time also, I was teaching class at a local scrapbooking store (which unfortunately closed down, boohoo) and was considering making the following project a class kit (Same as yesterdays book, too).


So the box was a plain wooden one that you get at Mike's or Jo's for about $6. I think it's about 8x8. I used a Marah Johnson technique from CE and Glimmer misted the flocked paper on the outside of the box. I used 7gypsies patterned paper backed on Tim Holtz fragments w/Glossy Accents as the top box inset. A Black cardstock rectangle is foam-tape mounted in the middle with a grungepaper heart and wings on top w/distress stickles. (phew!) It's also a 7gypsies knob on the front of the box, too. Love those little buggers, can't get enough of them. I was going to use the 7gypsies metal edgers for the top and bottom as well, but that would have added major $$$ to the cost of the class kit; So, I cut strips of black cardstock, scored it down the center, and thinly coated it with glossy accents.

Open the box and see what's inside....


A pretty little book made out of grungepaper! I had a BLAST making this. For one, grungepaper smells awesome. I'd say it's comparable to new leather-car smell and wrapping paper. (Yes, I said wrapping paper.) So the cover I distressed inked with Peeled Paint, then the spine is inked with Fired Brick; Both are also edge-distressed with Walnut Stain. On the inside I used extra-heavy brown cardstock to adhere the edges to the front of the cover and then the butchers twine through the eyelets helps guide the brown paper and keep it place; ditto for the back cover. Make sense? Greek yet? Sprachen Ze Sara?

For the pages I used more of the 7Gypsies patterned paper from the fragments on the front of the box and made pockets and secret places with them. Those awesome cards and little other pretty tags and such are from 7Gypsies, too, and are called "Gypsy Ephemera." I LOVE these cards/tags and such. There was also a massive amount of inking going on here... lots of walnut stain. I used another Tim-technique for tags; crumple, distress ink, spritz with water, heat emboss, then ink again! Such a fun effect. I also could not have completed my project without my crop-o-dile, such a spiffy well-loved tool in my projects. Well, that's about it! Ask any questions you'd like and enjoy the continued gratuitous photos. Thanks for looking!


Sunday, February 7, 2010

Heather & Heidi Inspired Mini

I was EXTREMELY fortunate to attend for the second year in a row Creative Escape hosted by the amazing team at Bazzill Basic Paper, Ranger Ink, Heidi Swapp and many others. It was the most phenomenal weekend; classes with Tim Holtz, Heidi, Heather Bailey, Marah Johnson, Carol Wingert and others, uber-yummy food and of couse, lots of great memories and new techniques! I was on quite a high when I returned home, and created this little minibook inspired mostly by Heather and Heidi. I think I've made about four total, but these are my favorite two. I made the book entirely from scratch, including the no-sew padded cover and used my Bind-it-All to put it together. Patterned Papers and Fabric are by Ms. Bailey and the Stickers and jewelled brad are from Ms. Swapp. Thanks for looking! I have another Creative Escape inspired project I created I will post tomorrow using Tim Holtz and 7Gypsies products. Talk to you all soon!!!


Friday, February 5, 2010

Before I Get Things Offically Started...


I thought I might post a few projects I've been working on recently...

Here is a mini book I did to help out my mom, but also, was for a special lady...


There it is! More projects to come and more magical things to happen!